
If you’ve ever made your own boxes or project enclosures on a lasercutter, you’ll know that the options for fastening them together can be a bit limiting. You can use the standard lasercut finger joint and glue your box, like this:

But then, your box is glued shut; you’re going to have a hard time modifying it. Or, you can get a bit fancier and use a captive nut, like this:

Assuming you can find square nuts, that works pretty well in thicker materials, but it’s fiddly, and in thinner materials, like the 3mm or eighth-inch ply and acrylic most of us use, the bolts are as thick as the material, which leads to issues with fragility and bolts and nuts protruding from the joints - not ideal.
If you want to get really fancy, you can make a tab-and-slot joint with a lasercut clip:
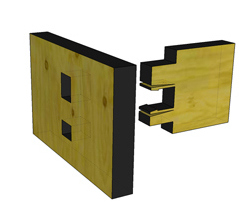
(Images courtesy this excellent Make article)
These work great in acrylic, but ply isn’t robust enough, and you can’t build your box with flush corners.
There must be a better way to do this, right? That’s what I thought, and the humble angle bracket comes to our rescue.
We spent some time looking, and it turns out that nobody makes small, pretapped angle brackets for M3 screws. So we decided to do something about that, and re-entered the exciting world of Chinese outsourcing to find someone who could make us the perfect bracket for assembling lasercut enclosures.
With a little searching, we found someone who could do what we needed, at a price that’s reasonable. I present, the Arachnid Labs Angle Bracket:

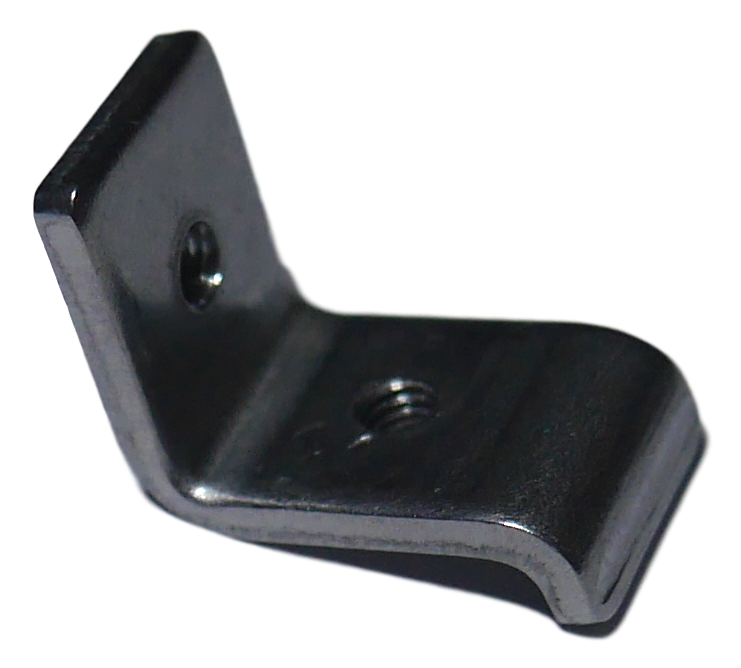
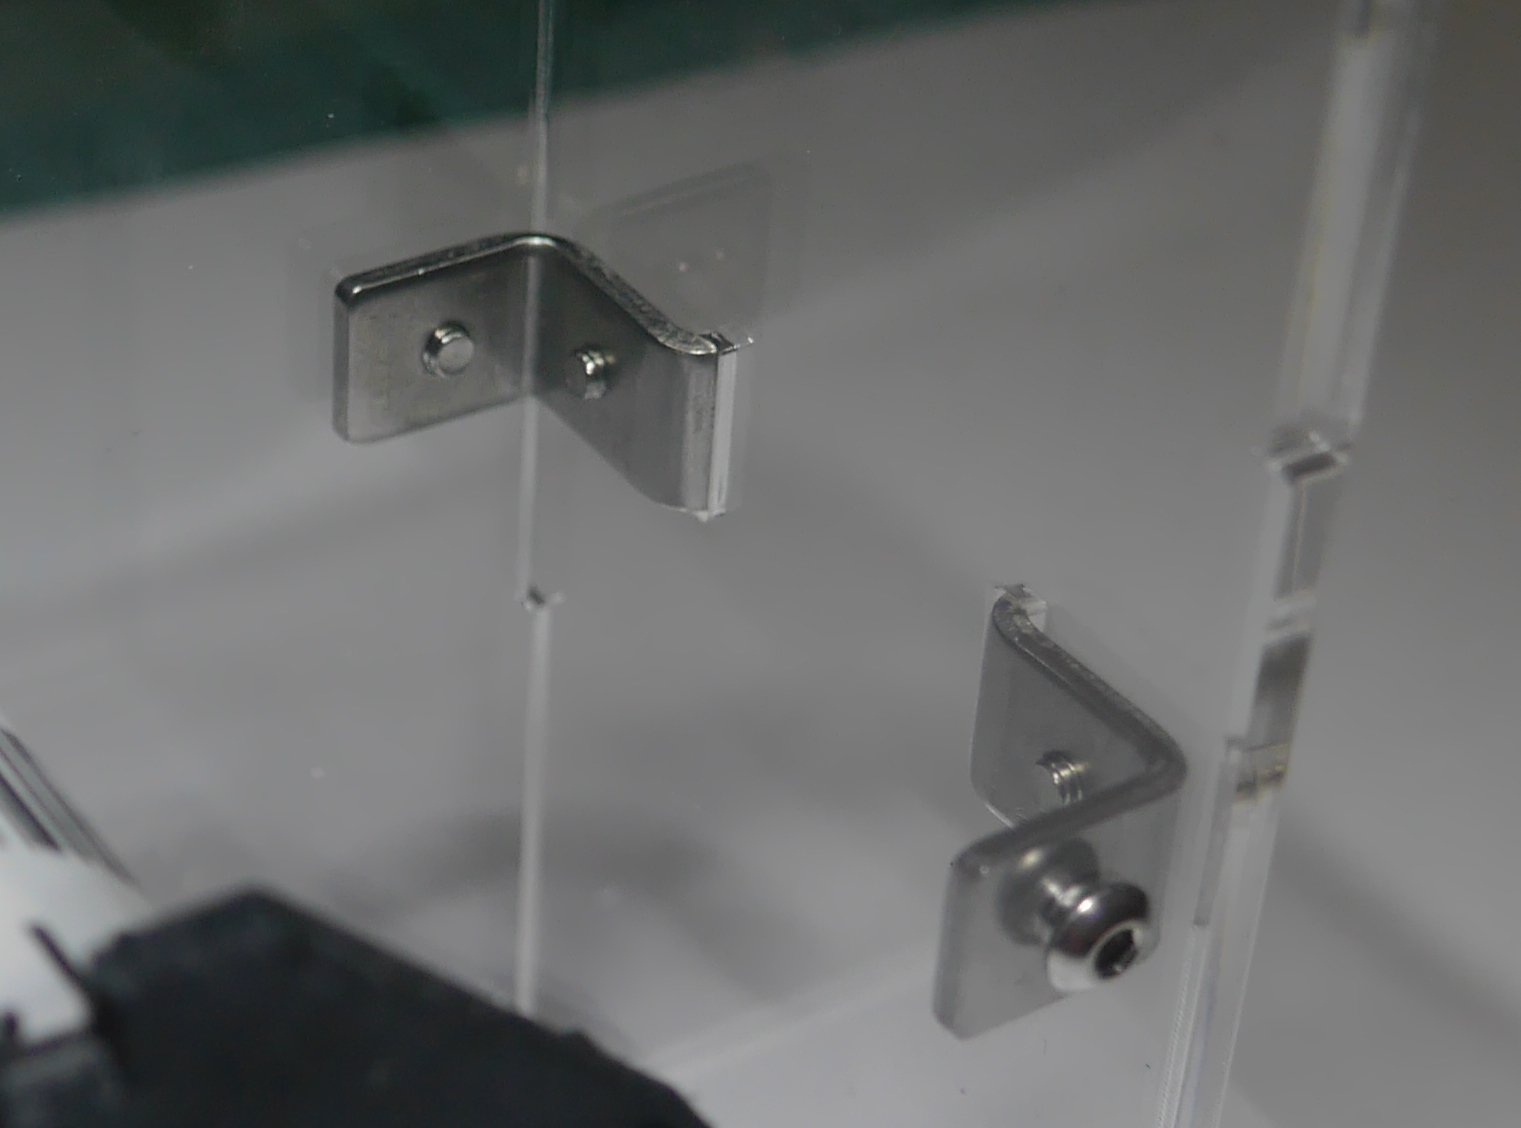
At its core, it’s a simple L-shaped angle bracket, with two pretapped M3 holes. It replaces two nuts, and with a few of them you can assemble a wide array of boxes and enclosures with very little time and trouble. The results are significantly more robust than you’d see with most other techniques, too.
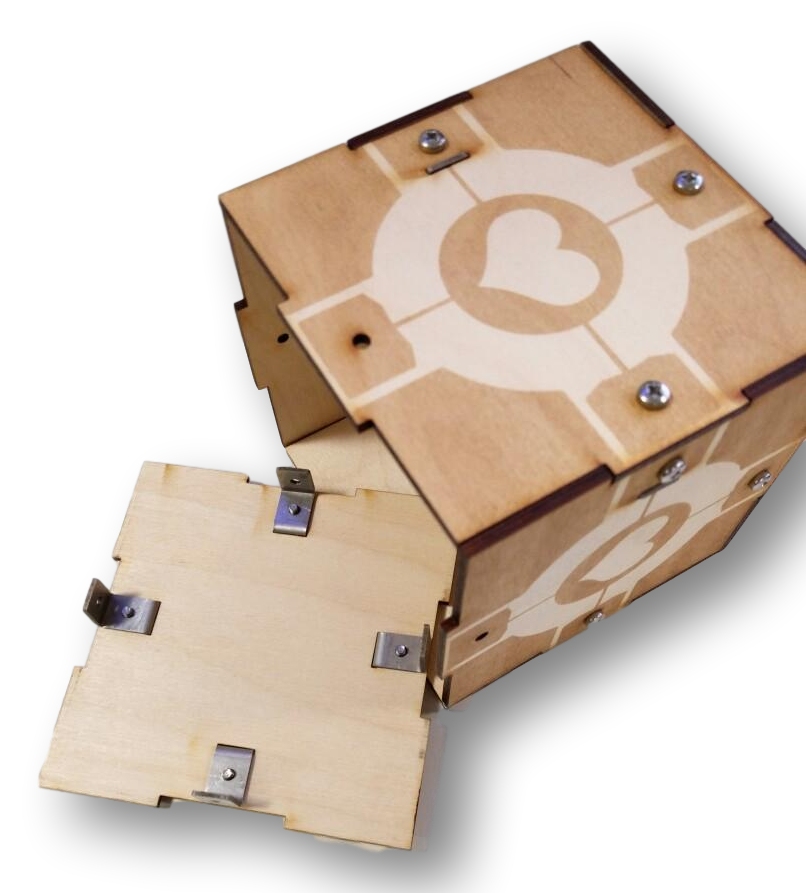
What makes the brackets really easy to work with is the extra tab you see sticking out on one side. By cutting a matching slot into one side of the joint, you can easily position the bracket during assembly, lining it up for the screw perfectly.
We’ve had a small production run of 1000 brackets made to test out, and they came out brilliantly.
If you think you’d find some useful, and would like to try them out, here’s the deal: We’re selling packs of 50 from the first batch for £9 or $12.50 USD plus shipping from the UK. 50 brackets is enough to make 4-6 complete boxes, depending on your requirements.
What’s more, we’d really like to see people making cool stuff with these, so if you buy a pack, make something neat, and publish the plans, we’ll refund you the cost of the brackets.
So who wants some free brackets? Email [email protected] with your address, and we’ll get you sorted out.
Oh, and if you have an idea for a better name than “Arachnid Labs Angle Brackets”, we need to talk too.